If you’re excited about gardening and want your plants to grow well, learning how to start seeds indoors with grow lights can make a big difference. Starting seeds indoors with grow lights accelerates plant growth and improves success rates.
This guide will show you the steps on how to start seeds indoors with grow lights before you plant them outside. You’ll learn how to make your seeds sprout, how to take care of different kinds of seeds, and how to avoid problems. Whether you’re new to gardening or have done it before, this guide will help you start your plants indoors successfully.
1. Why Use Grow Lights for Seed Starting
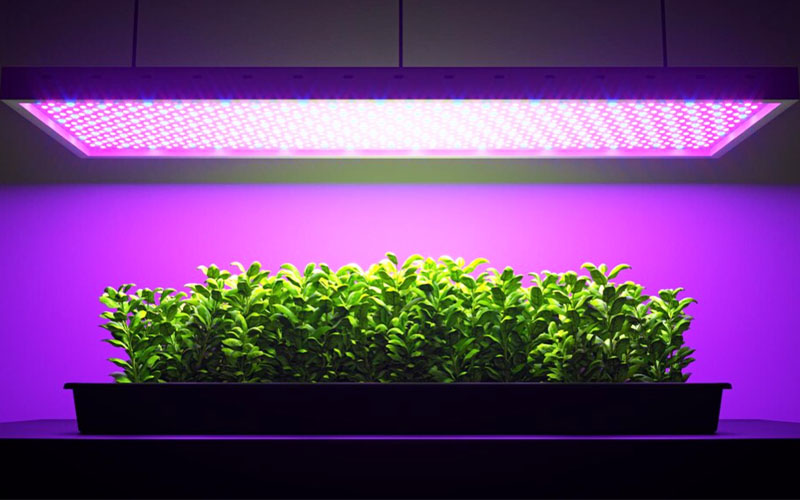
When embarking on the journey of seed starting, harnessing the power of grow lights offers significant advantages. These lights are designed to replicate the full spectrum of natural sunlight, providing the precise wavelengths necessary for photosynthesis – the process through which plants convert light energy into chemical energy to fuel growth. This becomes especially crucial in situations where access to ample natural sunlight is limited, such as during the winter months or in regions with inadequate sunlight exposure.
Fact 1: According to the U.S. Department of Agriculture, many vegetable and flower seeds require 12 to 16 hours of light daily for optimal germination and early growth.
Fact 2: A study published in the Journal of the American Society for Horticultural Science found that seedlings grown under appropriate artificial lighting exhibited faster growth rates and stronger root development compared to those relying solely on natural light sources.
2. Choosing the Right Grow Lights
Selecting the appropriate grow lights is a critical decision in optimizing your indoor seed starting process. Two popular options for this purpose are full-spectrum LED lights and fluorescent lights. Each type offers distinct benefits, allowing you to tailor your choice based on factors like energy efficiency, adjustability, and cost-effectiveness.
Full-Spectrum LED Grow Lights
LED (Light Emitting Diode) grow lights have gained prominence due to their efficiency and ability to deliver a full spectrum of light that closely mimics natural sunlight. LED technology has witnessed significant advancements, resulting in highly customizable and energy-efficient options.
Fact 1: A study published in the journal Scientific Reports demonstrated that plants grown under LED lights exhibited higher biomass and faster growth rates compared to those grown under traditional lighting systems. (source: LED Lighting Effects on Plant Growth)
Fluorescent Grow Lights
Fluorescent grow lights, particularly T5 and T8 tubes, are well-suited for seed starting due to their balanced spectrum and cost-effectiveness.
In conclusion, both LED and fluorescent grow lights offer compelling advantages for indoor seed starting. LED lights excel in efficiency and spectrum customization, while fluorescent lights provide a cost-effective solution with proven effectiveness. The choice ultimately depends on your specific needs, budget, and the extent to which you want to optimize light conditions for your seedlings’ growth.
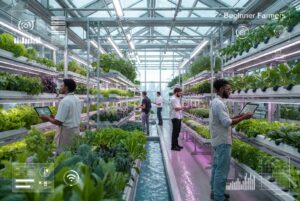
Read also: Vertical Farming3. Setting Up the Grow Lights
Effectively setting up your grow lights is pivotal to ensuring optimal growth conditions for your indoor seedlings. By following these guidelines, you’ll create an environment that minimizes stretching and provides the necessary light exposure for robust development.
Positioning the Lights
To prevent the common issue of seedlings stretching or becoming overly leggy due to inadequate light, position the grow lights in close proximity to the plants.
This close proximity simulates the intensity of natural sunlight and encourages sturdy, upright growth. Regularly monitor the distance between the lights and the seedlings as they grow, ensuring that you adjust the height accordingly.
Using a Timer
Controlling the duration of light exposure is equally important for successful seedling growth. Employing a timer allows you to maintain consistent light cycles, mimicking natural day-night patterns and supporting healthy development.
Setting the timer to turn off the lights for 8 hours provides the seedlings with crucial dark periods that facilitate essential metabolic processes and prevent excessive stress.
By adhering to these recommendations, you’ll establish an ideal light setup that fosters strong, compact seedling growth and maximizes their potential for successful transplantation into your outdoor garden.
4. Starting Seeds Indoors with Grow Lights
Commencing your seed-starting journey with grow lights involves a series of precise steps that lay the foundation for healthy and thriving seedlings. Here’s a breakdown of the essential aspects to consider:
Selecting High-Quality Seeds
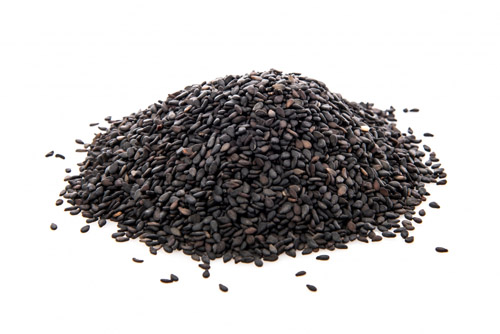
The quality of the seeds you choose significantly impacts the success of your indoor seed-starting efforts. Opt for seeds from reputable and trusted sources, as these are more likely to be genetically sound and free from diseases or defects.
Ensure that the seeds are within their recommended shelf life and check for any indication of poor quality, such as discoloration or damage.
Using Sterile Seed-Starting Mix
The choice of growing medium plays a crucial role in promoting healthy seedling development. Utilize a sterile seed-starting mix to minimize the risk of diseases and pests that can hamper germination and growth.
The sterile mix provides a disease-free environment that fosters optimal root growth and nutrient uptake, setting the stage for robust seedlings.
Planting at the Recommended Depth and Spacing
Each type of seed comes with specific requirements for planting depth and spacing, as indicated on the seed packet. Adhering to these guidelines ensures that seedlings have ample room to grow and receive the appropriate amount of nutrients and water.
Proper planting depth prevents seeds from drying out or being buried too deeply, while accurate spacing minimizes competition for resources and promotes uniform growth.
By diligently selecting top-quality seeds, using sterile growing medium, and adhering to planting guidelines, you’re setting your indoor seedlings on a path to thrive under the nurturing glow of grow lights.
5. Germination Tips
Successfully germinating seeds under grow lights requires a delicate balance of moisture, temperature, and protection. Implementing these proven germination strategies will increase the likelihood of strong and healthy seedling emergence.
Using Plastic Domes or Wrap for Humidity
Maintaining optimal humidity levels around germinating seeds is crucial for ensuring successful sprouting. Placing plastic domes or covering trays with plastic wrap creates a mini greenhouse effect, trapping moisture and creating an environment conducive to germination.
This technique provides a controlled microclimate that supports uniform moisture distribution, encouraging swift and even seedling emergence.
Consistently Moist Soil, Not Waterlogged
Balancing moisture is a key consideration during germination. While it’s essential to keep the soil consistently moist, it’s equally important to avoid overwatering, which can lead to damping-off – a fungal disease that attacks young seedlings.
By striking the right balance, you ensure that seeds receive sufficient hydration without subjecting them to conditions that promote disease.
Maintaining Optimal Germination Temperature
Different plant species have varying temperature preferences for germination. Research the specific requirements of the seeds you’re starting and maintain a consistent temperature that aligns with their needs.
For instance, tomatoes generally germinate best at temperatures between 70-80°F (21-27°C), while lettuce prefers cooler temperatures around 50-60°F (10-15°C).
By customizing temperature conditions to suit each type of seed, you’ll ensure that germination occurs efficiently, providing your emerging seedlings with the optimal environment they need to flourish under the glow of grow lights.
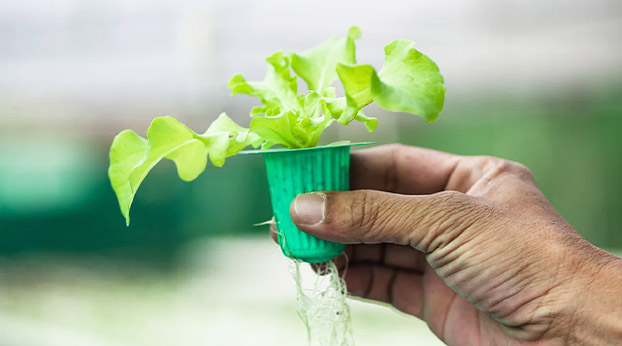
6. Transplanting Seedlings
Moving your seedlings from their indoor haven to the great outdoors is a pivotal step in their journey toward becoming full-fledged plants. Transplanting requires careful timing and preparation to ensure a seamless transition and robust growth in their new environment.
Waiting for the Second Set of True Leaves
Before transplanting, it’s essential to wait until your seedlings have developed their second set of true leaves. These leaves emerge after the initial seed leaves (cotyledons) and provide a more accurate representation of the plant’s growth pattern.
These leaves indicate that the seedlings have established a strong root system and are better equipped to endure the stress associated with transplantation.
Hardening Off for Smooth Transition
The process of hardening off prepares your indoor-grown seedlings for the challenging outdoor environment. Gradually acclimating them to changing light, temperature, and wind conditions minimizes shock and enhances their ability to adapt.
Begin the hardening-off process by placing seedlings in a sheltered outdoor location for a few hours a day, gradually increasing exposure over 7-10 days. This process toughens them up, enhancing their ability to thrive in their new surroundings.
By following these guidelines, you’ll ensure that the transition from indoor seedling to outdoor plant is as smooth as possible, setting the stage for healthy growth and a bountiful garden.
7. Common Mistakes to Avoid
Successfully starting seeds indoors with grow lights hinges on avoiding some common pitfalls that can hinder the growth and development of your seedlings. Be mindful of these potential mistakes to ensure optimal results:
1. Overwatering and Damping-Off
Overwatering is a prevalent mistake that can have detrimental consequences for your seedlings. Excessive moisture in the growing medium can lead to a condition known as damping-off, where fungal pathogens attack and destroy young seedlings.
To prevent this, maintain a balance between moisture and drainage. Ensure your seed-starting trays have proper drainage and only water when the top layer of the soil feels slightly dry to the touch.
2. Insufficient Light and Leggy Seedlings
Insufficient light is a common issue that leads to seedlings stretching or becoming “leggy.” Inadequate light prompts seedlings to elongate in search of more light, resulting in weak and fragile stems.
To combat this, position grow lights appropriately, providing adequate light intensity and duration. Aim for the recommended 14-16 hours of light per day to promote sturdy and compact seedling growth.
3. Incorrect Timing for Outdoor Season
Timing is critical when starting seeds indoors. Starting too early or too late can result in challenges when it’s time to transplant seedlings outdoors.
Consult local planting calendars or gardening resources to determine the optimal timing for starting specific seeds based on your region’s climate and frost dates. This ensures that your seedlings are well-prepared for the outdoor growing season.
By steering clear of these common mistakes, you’ll set the stage for healthy, robust seedlings that flourish under the care of grow lights, paving the way for a successful gardening season.
8. Benefits of Starting Seeds Indoors
Embarking on the journey of starting seeds indoors offers an array of advantages that contribute to the success of your gardening endeavors. Delve into the following benefits and discover how this approach can elevate your gardening experience:
1. Extended Growing Season and Earlier Harvest
One of the most significant advantages of starting seeds indoors is the extension of your growing season. By kickstarting the germination process indoors, you gain a head start on the growing season, enabling your plants to establish robust root systems and sturdy growth before being transplanted outdoors.
This early start grants you the opportunity to enjoy the fruits of your labor sooner, providing a gratifying experience and potentially yielding more bountiful harvests.
2. Greater Control over Growing Conditions
Indoor seed starting empowers you with greater control over various growing conditions, fostering an environment conducive to healthy seedling development. You can fine-tune factors like temperature, humidity, light intensity, and nutrient levels to optimize growth.
This level of control ensures that your seedlings receive the utmost care and attention during their critical early stages, setting the stage for strong and vibrant plants.
3. Healthier Plants with Stronger Root Systems
Starting seeds indoors nurtures the growth of robust root systems. The controlled environment promotes root development, which is essential for plants to anchor themselves securely in the soil, access nutrients, and withstand environmental stressors.
Healthy root systems translate to stronger, more resilient plants that are better equipped to thrive in varying weather conditions and resist pests and diseases.
By embracing indoor seed starting, you unlock these benefits and equip yourself with the tools to cultivate a flourishing garden that yields earlier harvests, resilient plants, and a deeper connection to the intricate growth process.
Read also: How to grow azolla
FAQs
1. Can I use regular household lights instead of specialized grow lights for seed starting?
While regular household lights emit light, they lack the specific spectrum needed for optimal vegetable plant growth. Specialized grow lights, such as full-spectrum LED or fluorescent lights, provide the essential wavelengths required for photosynthesis. Using these dedicated lights ensures healthier and more vigorous seedlings.
2. How close should I position the grow lights to my seedlings?
Position the grow lights approximately 2-4 inches above the seedlings. This distance prevents seedlings from stretching or becoming leggy while ensuring they receive adequate light intensity. Regularly monitor their growth and adjust the light height as needed.
3. Can I start all types of seeds indoors using the same method?
While the basic principles of seed starting remain consistent, different types of seeds may have specific requirements for temperature, light, and humidity. It’s essential to research and cater to the unique needs of each seed variety to achieve successful germination and growth.
4. Is it possible to start seeds indoors without using grow lights?
Yes, it is possible to start seeds indoors near a sunny window. However, natural sunlight might not always provide consistent and sufficient light intensity, especially during the winter or in regions with limited sunlight. Using grow lights ensures that your seedlings receive consistent light, resulting in healthier and more robust growth.
5. How do I prevent damping-off disease in my seedlings?
Damping-off is a fungal disease that affects young seedlings. To prevent it, use a sterile seed-starting mix, ensure proper drainage, avoid overwatering, and maintain good air circulation. Providing a balanced and controlled environment with adequate spacing between seedlings can significantly reduce the risk of damping-off.
The bottom line
Starting seeds indoors with grow lights can enhance gardening success by selecting seeds, using appropriate lights, and creating an optimal growing environment. Tailoring your approach to each seed type ensures success during germination, transplantation, and hardening stages. This comprehensive guide equips you with the knowledge to nurture various seeds indoors and transplant them into your garden.
Author’s Bio
I am Frank, your enthusiastic blogger and proud representative of HGS Hydro Shop. Embracing the wonders of hydroponics and indoor gardening, I love to write on various topics, from plant care conundrums to innovative solutions. I enjoy sharing tips and solutions for plant care, so let’s grow an amazing garden together!